
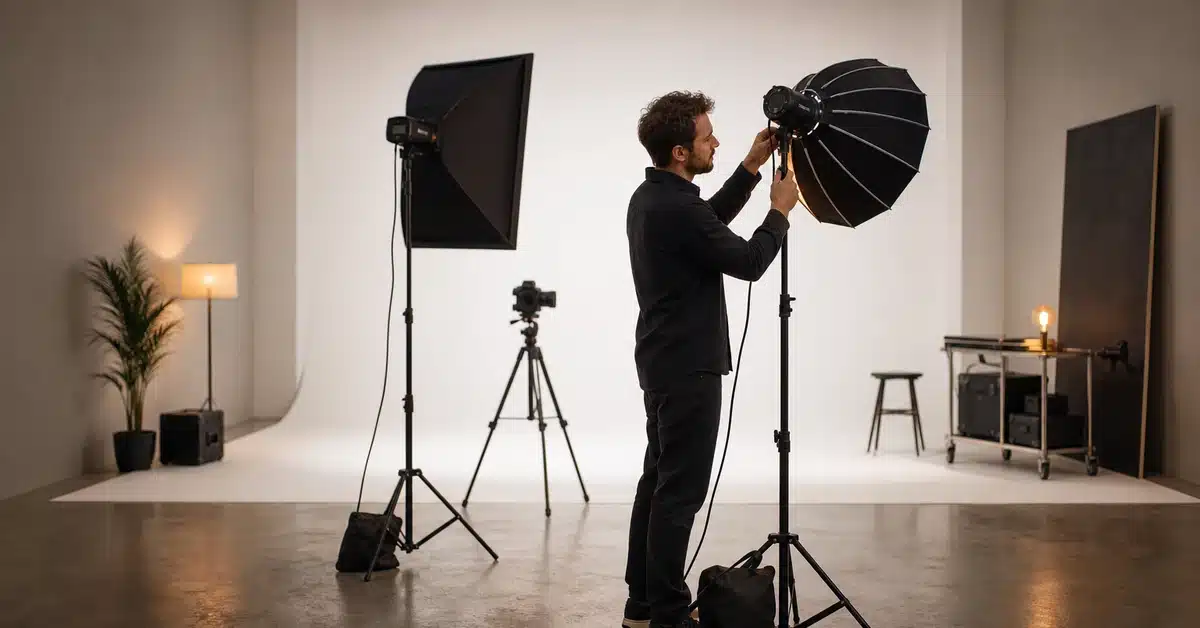
Studio lighting tips for photographers aren’t just useful — they’re the difference between images that look “nice” and work that stops people mid-scroll. Whether you’re booking your first professional studio session or you’ve put in thousands of hours behind the lens, understanding how to shape, control, and direct artificial light is the skill that separates technically competent shooters from truly working photographers. Studio lighting tips for photographers always start in the same place: learning to see light before you learn to control it. Studio light gives you something natural light never will — complete, repeatable control over every photon that hits your subject. No chasing golden hour, no wrestling with blown-out windows, no surrendering your shoot to the weather. Just you, your creative vision, and the tools to execute it precisely.
In this guide, you’ll find practical, no-nonsense studio lighting tips for photographers at every level — from building your first three-point setup to mastering the cyclorama techniques that deliver seamless, infinitely versatile backgrounds. If you’ve been looking for a resource to actually level up your studio game, you’re in the right place.
Studio Lighting Tips for Photographers: The Three-Point Foundation
Every studio lighting setup — no matter how complex — traces its roots back to the three-point system. Master this, and you have a foundation you can build virtually any look on top of. Skip it, and you’ll spend years fighting problems that could have been solved in your first session. The best studio lighting tips for photographers always return to this architecture: key light, fill light, backlight. Get these three working together and you have full control over dimension, mood, and depth.
The Key Light: Your Primary Workhorse
The key light is your dominant light source. It establishes the direction, quality, and intensity of the primary illumination on your subject. In portrait photography, it’s typically placed at roughly 45 degrees to the side and slightly above the subject’s eye line — a position that creates natural modeling on the face by casting subtle shadows that define the nose, cheekbone, and jawline.
Power matters here. Your key light should be the brightest source in your setup, and the quality of that light (hard vs. soft) depends entirely on your modifier choice (more on that in the next section). Common key light sources include strobes and monolights, with LED continuous lights becoming an increasingly viable option for photographers who also shoot video.
Pro tip: Start by placing your key light, metering it alone, and locking in your exposure before you introduce any other light source. This gives you a clean reference point for the entire setup.
The Fill Light: Controlling Shadow Density
Shadows are not the enemy — uncontrolled shadows are. The fill light’s job is to lift the shadow areas created by the key light to a level that serves your creative intent. Think of the fill as a dial, not an on/off switch: a high fill ratio (key and fill at similar power) creates a flat, even commercial look ideal for product photography or clean corporate headshots. A low fill ratio (significant power difference between key and fill) creates dramatic, moody portraits with deep, expressive shadows.
You don’t always need a second strobe for fill. A large white reflector positioned opposite the key light can do the job beautifully — and costs significantly less. When you do use a strobe as your fill, set it 1.5 to 2 stops lower than the key to establish a natural-looking 3:1 or 4:1 lighting ratio.
The Backlight: Depth and Separation
The backlight — sometimes called a hair light or rim light — is positioned behind the subject, aimed toward the camera, often from above or to one side. Its purpose is to create a thin edge of light along the subject’s hair, shoulders, or silhouette, separating them visually from the background and adding three-dimensional depth to the image.
Without a backlight, subjects can appear to melt into the background, especially in lower-key setups with darker backgrounds. Even at a low power setting, a well-placed rim light adds a layer of production quality that immediately elevates the photograph. Don’t sleep on it.

Studio Lighting Tips for Photographers: Choosing the Right Modifiers
Raw light from a bare strobe head is harsh, specular, and generally unflattering for most portrait and beauty work. Light modifiers solve this by shaping, diffusing, or redirecting that light before it hits your subject. Choosing the right modifier is one of the most impactful studio lighting tips for photographers to internalize early — get this right and every other element of your setup becomes easier.
Softboxes: The Industry Standard
Softboxes are the most common studio modifier for a reason: they produce soft, directional light that wraps around the subject while still maintaining a defined shadow edge. The size of the softbox is the key variable. Larger softboxes (24×36 inches and up) produce softer, more wrapping light — great for portraits and fashion. Smaller softboxes create harder, more directional light with crisper catchlights in the eyes, often preferred for dramatic beauty or editorial work.
Octaboxes — the circular variation — produce a rounder catchlight that many photographers find more natural and flattering for portrait work. If you’re shooting beauty, headshots, or lifestyle content, an octabox is an excellent go-to modifier. Studios like Lightz Out Studios stock a range of softbox sizes precisely so shooters can select the modifier that fits the shoot — not improvise around what’s available.
Umbrellas: Speed and Versatility
Umbrellas are the fast food of light modifiers — quick to set up, easy to pack, and surprisingly versatile. Shoot-through umbrellas (positioned between the light source and subject) create a large, soft, wraparound light quality. Reflective umbrellas (silver or white interior, bouncing light back toward the subject) produce a different quality — slightly more directional and contrasty.
The trade-off with umbrellas is spill. Because the light radiates in a wide arc, it’s harder to control where it falls — a real consideration in smaller spaces or when you want to keep tight, directional light off your background. In a well-equipped studio with larger working areas, this is rarely a limiting factor.
Beauty Dishes: Punchy and Crisp
Beauty dishes occupy the territory between a softbox and a bare strobe — they produce a harder, crispier light with a distinctive circular catchlight and dramatic shadow transition. They’re a staple in fashion and beauty photography for their ability to render skin texture and fine detail at a level softer modifiers can wash out.
The 22-inch white beauty dish is the most common starting point. Silver interiors create a harder, more contrasty look; white interiors soften it slightly. Add a sock diffuser over the front of a beauty dish and you split the difference — a soft, round, dimensional quality that works across portrait styles. Photography Life’s deep dive on beauty dishes is worth bookmarking if you’re exploring this modifier for the first time.
Grids, Snoots, and Flags: Precision Control
Once you’ve dialed in your main modifier, these accessories let you sculpt your light with surgical precision. A grid attached to a softbox narrows the spread of light to a specific angle, concentrating it and preventing spill onto the background or into the camera lens. Snoots focus a strobe into a tight spot, perfect for hair lights or dramatic pools of light on a background. Flags and black foam board are used to block or cut light, creating clean edges and preventing lens flare.
Understanding how to use these tools is where studio lighting tips for photographers move from beginner-level setup to intentional, director-level light shaping. They’re the difference between placing lights and designing light.
Cyclorama Techniques: Advanced Studio Lighting Tips for Photographers
A cyclorama — or “cyc wall” — is a curved, seamless wall-floor intersection that eliminates the visible corner of a standard studio, creating the illusion of an infinite, continuous background. Cycloramas are the go-to backdrop for commercial photography, fashion work, music videos, product shots, and any scenario where a clean, uninterrupted background is essential. Lighting one correctly is its own discipline — and one of the most valuable studio lighting tips for photographers working in commercial or high-production contexts.
What Makes a Cyclorama Lighting Challenge Unique
The cyc wall doesn’t just serve as a background — it becomes part of the image. How you light it dramatically changes the final result: a well-lit white cyc can blow out to pure white for that high-key commercial look, or be underlit to gray or even black for a dramatically different mood. Getting consistent, even light across the entire sweep of a cyclorama requires deliberate technique.
Lighting the White Cyc for a Pure-White Background
Achieving a true white background in camera — rather than in post — requires overexposing the cyclorama relative to your subject exposure by approximately 1.5 to 2 stops. This means you’ll dedicate at least two strobes specifically to background lighting, positioned to provide even, cross-lighting coverage across the sweep of the cyc with no hot spots or gradients.
The lights are typically placed low, pointed upward at the cyc surface, or mounted high and pointed down — experimentation with your specific studio geometry is key. Meter the background at multiple points (left, center, right) to verify even exposure before your subject steps in. Your subject then needs to be positioned far enough from the background — typically 8 to 12 feet — that the overexposed background doesn’t spill onto them and wash out shadow detail. This working distance is one of the reasons Lightz Out Studios’ double cyclorama wall with its generous square footage is a genuine production advantage over cramped rental spaces that don’t give you room to work.
Creative Angles and Gradient Effects
Not every cyc shoot calls for blown-out white. Using the cyclorama as a shaped, graduated background — lighting it from one side to create a dark-to-light gradient, or keeping it dramatically underlit for a dark key look — is equally powerful. Fashion and music video work frequently uses this approach to create editorial, cinematic backgrounds that retain texture and dimension without resorting to physical colored paper or digital compositing.
Colored gels added to your background strobes introduce another dimension entirely. A warm amber wash on the bottom of a cyc behind a subject lit with cool, neutral key light creates stunning separation and production value that reads immediately as “high-budget” — even when the setup itself is straightforward.

Light Ratios and Exposure Control
One of the most powerful — and most underutilized — concepts in studio photography is deliberate control of light ratios. Understanding how to read and set ratios predictably is what allows you to reproduce a look across multiple sessions, not just luck into it once. These are the studio lighting tips for photographers that pay dividends long after the initial learning curve flattens out.
Understanding the Stop System
Each full stop of light represents a doubling or halving of the amount of light reaching your sensor. When your key light is one stop brighter than your fill, you have a 2:1 lighting ratio — relatively flat and even. At two stops difference, you’re at a 4:1 ratio — noticeably more contrast and depth. At three stops, you’re at an 8:1 ratio with pronounced shadows and a more dramatic, editorial quality.
None of these ratios is objectively better — they serve different visual languages. Commercial headshots for LinkedIn profiles often work best at 2:1 or 3:1 for flattering, even skin rendering. Editorial portrait and fashion work frequently pushes to 4:1 or beyond. Music video and cinematic portrait work can go even more dramatic depending on the artist’s visual identity.
Using a Light Meter in the Studio
A dedicated incident light meter is one of the most underrated tools a studio photographer can own. Unlike your camera’s reflective meter, an incident meter reads the light falling onto the subject from the light source — giving you a true, consistent reading that isn’t influenced by what colors and tones your subject is wearing.
Hold the meter at your subject’s position, dome pointed toward the camera, and take a reading for each light source individually. This gives you the exact power difference between your key, fill, and background lights — taking the guesswork out of ratio building. Sekonic’s light metering guide is a thorough starting resource for photographers learning incident metering for the first time.
Balancing Ambient and Strobe
In studio environments, you’ll often want to eliminate ambient light entirely and shoot purely on strobe. This is achieved by setting your shutter speed fast enough to cut out the ambient room light — typically 1/160 to 1/250 — while your aperture and ISO control how much of your strobe exposure registers. Most studio strobes have a sync speed ceiling around 1/200 to 1/250; exceeding it produces a dark band across the frame.
When you want to blend ambient with strobe — for natural-feeling interior work or behind-the-scenes style content — slow your shutter speed to let more ambient in while dialing down your strobe output for a blended, mixed-light quality. This technique requires balancing both sources carefully, but delivers beautifully organic results when executed well.
Common Studio Lighting Mistakes (and How to Fix Them)
The best studio lighting tips for photographers often arrive disguised as expensive lessons. Here are the most common pitfalls and how to correct them before they cost you a shoot.
Mistake 1: Flat, Directionless Light
Placing your key light directly in front of and at the same height as your subject kills all dimensional modeling on the face. It looks like a passport photo. The fix: move your key light to the side and raise it above eye line to create shadow that defines facial structure. For most subjects, a 45-degree angle from the camera axis and 30 to 45 degrees above eye line is a strong starting point.
Mistake 2: Ignoring the Background
Shooting a portrait with a gray, wrinkled, or unlit background and hoping to fix it in post is a workflow tax you don’t need to pay. Light your background intentionally — whether that’s an even wash for clean commercial work, a gradient for editorial depth, or a pop of color for creative branding work. Background lighting is part of the photograph, not a footnote.
Mistake 3: One-Size-Fits-All Modifier Choices
Pulling out the same 36-inch softbox for every single shoot is the studio equivalent of using Auto mode. Different subjects, styles, and creative briefs call for different light qualities. Spend time with multiple modifier types — umbrellas, beauty dishes, grids — in the same session on the same subject and study the results side by side. Your eye will learn to see modifier characteristics faster than any tutorial can teach you.
Mistake 4: Not Metering Individually
Winging your ratios by eye is a recipe for inconsistency. Use a light meter, take individual readings for each source, and document your setups in a shot log. This investment in precision pays dividends every time you need to reproduce a look or troubleshoot why something isn’t working the way you expected.
Mistake 5: Poor Color Temperature Mixing
Mixing strobe and continuous LED without checking color temperature is one of the fastest ways to create images that look technically amateurish. Strobes typically output around 5,500 to 6,000K; LED panels vary widely. Either use exclusively one type, or use a ColorChecker card and match color temperatures in post. X-Rite’s ColorChecker tutorials are an excellent starting point for photographers building color-accurate workflows.
Planning Your Studio Shoot Day for Maximum Results
Knowing studio lighting tips for photographers is one thing — executing them efficiently on a real shoot day is another. The difference between a smooth, productive studio day and a chaotic one is almost always in the preparation. Apply these studio lighting tips for photographers before you even arrive at the studio and you’ll walk in as a pro, not a problem-solver.
Pre-Shoot Setup Checklist
Arrive with your lighting plan already sketched — even a simple diagram of light positions on a whiteboard or phone notes app. Know which modifier you’re starting with for each look. Have your camera settings (aperture, ISO, shutter sync speed) pre-dialed. Check that all strobes trigger correctly from your trigger before your client or subject arrives. Charge all batteries. These five minutes of prep prevent twenty minutes of troubleshooting with people watching.
Test Shots and Histograms
Your first five to ten frames are diagnostic shots, not hero shots. Use them ruthlessly — check your histogram for highlight clipping and shadow detail, review your catchlights, verify that your background exposure is where you want it. Zoom into your test frames at 100% to check focus accuracy. Only once your technical foundation is confirmed should you shift your full attention to directing the subject and capturing the work.
Adapting on the Fly
Even with the best plan, studio shoots evolve. Your subject’s facial structure responds differently to your planned setup than you expected. A new creative direction emerges during the shoot. Budget time in your session plan for intentional experimentation after your primary looks are captured. Some of the most memorable studio work comes from the fifteen minutes of creative play after the “safe” shots are in the bag.
Equipment Care and Wrap
These studio lighting tips for photographers apply beyond the shoot itself — how you treat equipment defines your reputation in a professional rental environment.
Strike your lights carefully — coil cables without kinking them, remove gels and save them, cap strobe heads to protect the modeling lamp and flash tube. Return equipment to its case or rack in the same clean condition you’d want to receive it. If you’re working in a professional rental studio, this is both professional courtesy and a practical guarantee that the equipment is in top condition for your next session.
Take Your Studio Lighting to the Next Level at Lightz Out Studios
Reading studio lighting tips for photographers only takes you so far — the real learning happens when you’re under live lights with real strobes, real modifiers, and real creative pressure. Lightz Out Studios gives San Diego’s creative community access to a professional environment that removes every barrier to doing serious work: a double cyclorama wall, on-site production kitchen, professional strobe packages, and a flat hourly rate with no hidden fees.
Whether you’re a freelance photographer planning your next client shoot, a videographer scouting a location for a branded content campaign, or a music artist ready to step up your visual identity, Lightz Out is built for you. If this guide has given you ideas for your next studio setup, we’re ready when you are.
For professional headshot sessions, explore our headshots packages — individual and team sessions available, professionally lit and camera-ready from the first frame.
Ready to put these studio lighting tips for photographers into practice? Book your session at Lightz Out Studios — San Diego’s premier creative production space at 92123.
Need a full-service production team to complement your studio booking? Our partners at Pretzel Logic Productions provide end-to-end video and commercial production services from the same San Diego campus.

