
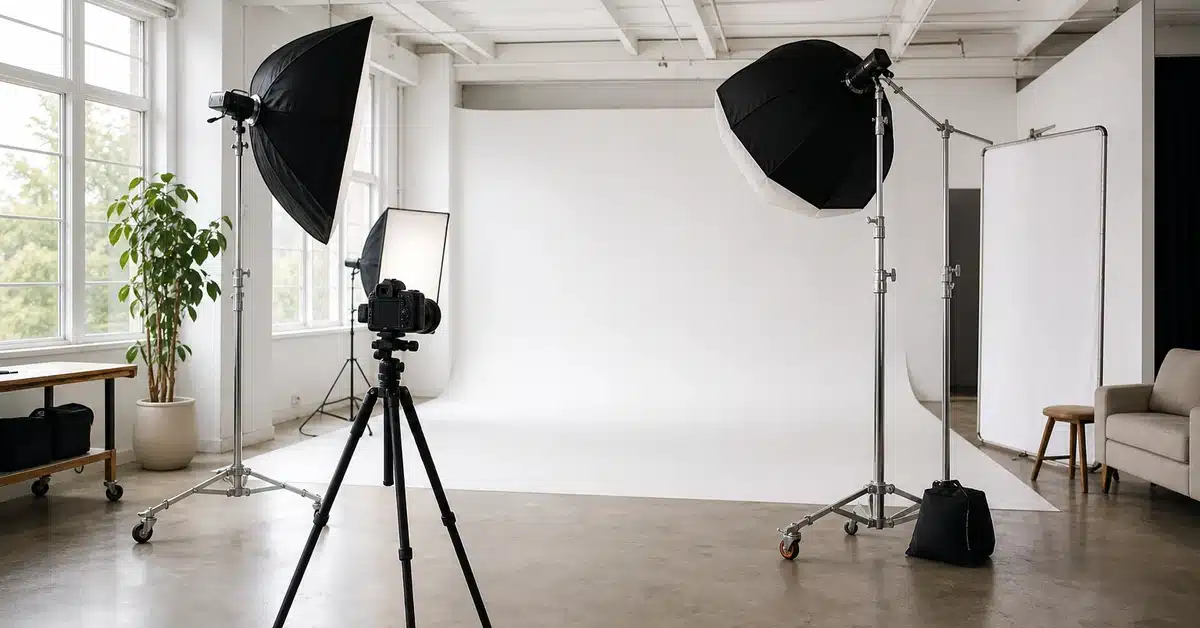
Great lighting tips for photography don’t start with gear. They start with understanding what light actually does when it hits a subject — the direction it travels, the shadows it casts, and the mood it creates before you ever touch a modifier. Most photographers spend years chasing better equipment while overlooking the single variable that makes every piece of gear work: knowing how to see and shape light in real time.
David Hobby, the photographer behind the Strobist movement, put it directly: “Learning how to create your own light is a critical foundational skill to becoming a capable and versatile photographer.” He’s right. You can own the best camera on the market and still produce flat, forgettable images if you treat light as something that just happens to be there. The photographers whose work stops you mid-scroll? They control light the way a chef controls heat — instinctively, and with intention. These lighting tips for photography are not about memorizing gear specs, and that’s the first thing to understand about them. They’re about building an intuition for what light is doing and how to bend it toward what you want.
The photography lighting equipment market was valued at nearly $50 billion in 2024 and is projected to reach over $65 billion by 2032. Content creators now represent nearly 47% of global equipment purchases, and LED lighting alone commands roughly 35% of the accessories market with a growth rate above 11%. These numbers tell a story: more creators than ever are investing in lighting because they’ve realized the camera body matters less than what you put in front of it. Anyone searching for actionable lighting tips for photography is really asking the same underlying question: how do I make images that look like the ones I see in my head? The answer, almost always, is light control.
Why Lighting Is the Single Most Important Skill in Photography
Light is everything. Not a metaphor — literal physics. A photograph is a recording of light bouncing off a subject and hitting a sensor. That’s the entire medium. Composition, color, moment — those matter enormously. But light is the raw material every one of those elements is built from. The best lighting tips for photography distill down to a single principle: learn to see light before you try to control it.
Photographers use diffusers, reflectors, shaders, and other modifiers to shape natural light into something intentional rather than accidental. A diffuser can soften harsh midday sunlight while retaining the daylight look — same color temperature, completely different quality. A reflector can fill in shadows on your subject without adding a second light source. These are fundamentals, not advanced techniques. Master them early and everything else gets easier. The most effective lighting tips for photography aren’t gear recommendations — they’re principles you can apply with whatever light source is available.
The Photography Life team explains that sometimes soft light is desired and sometimes harsher light is preferred — knowing when to reach for which is what separates practical lighting tips for photography from abstract theory — it depends entirely on what story the image needs to tell. A portrait of a CEO calls for soft, flattering light that communicates warmth and approachability. A fitness brand campaign might want hard, directional light that emphasizes texture and definition. Same photographer, same camera — completely different result, driven entirely by the lighting decision.
High-quality images boost conversion rates by 67% and decrease return rates by 10%, according to John Mak Photography’s product lighting guide. For e-commerce and product photographers, that’s not a nice-to-have — it’s revenue. And 74% of online shoppers rely on product images to make purchasing decisions. The lighting in those images is doing heavy lifting those shoppers will never consciously notice.

Natural Light Fundamentals: Direction, Quality, and Time of Day
Natural light is free, available everywhere, and capable of producing images that studio strobes can’t replicate. But free doesn’t mean simple. The difference between a snapshot and a photograph shot in natural light is knowing how to read what the light is doing and where you need to be relative to it. These lighting tips for photography apply whether you’re holding a $5,000 camera or your phone: position relative to the source matters more than the source itself.
Understanding Light Direction
Light always travels in a straight line. That sounds obvious, but the implications are worth sitting with: the direction of your light source defines where every shadow falls and every highlight lands. Move your subject six inches left, and the entire mood of the image can shift.
Love Studios NYC emphasizes that direction defines shadows and highlights more than any other variable. Front lighting flattens texture — good for minimizing skin imperfections, bad for showing the grain of wood or the weave of fabric. Side lighting reveals texture and dimension. Backlighting creates separation and drama. None of these is “correct.” Each one serves a different purpose.
Hard Light vs. Soft Light
Hard light comes from a small source relative to the subject — direct sun at noon, a bare speedlight, a single bulb with no diffusion. It produces sharp, defined shadows and high contrast. Soft light comes from a large source — an overcast sky (the entire cloud layer becomes the light source), a large softbox, or window light bounced off a white wall. It wraps around the subject, producing gradual shadow transitions.
The rule isn’t “soft light is better.” It’s “soft light is more forgiving, hard light is more expressive.” Learn to use both intentionally. The closer the subject is to the light source, the larger the penumbra becomes and the softer the shadow, as PetaPixel’s detailed breakdown of light interaction explains. This is the inverse square law in practice — doubling the distance from light to subject doesn’t halve the intensity, it quarters it. Understanding this relationship lets you control contrast without changing modifiers. The most underrated lighting tips for photography all trace back to this one physical law — and once you internalize it, every modifier and light placement decision becomes more intuitive.
Golden hour — the hour after sunrise and before sunset — gives you warm, directional light that flatters skin tones and adds natural dimension. It’s not a cliché. It’s physics. The angle of the sun through more atmosphere scatters blue wavelengths and lets warm tones through. Knowing why it works lets you replicate aspects of it in studio when golden hour isn’t available.
The Three-Point Lighting System: Key, Fill, and Backlight Explained
Three-point lighting is the most versatile setup in photography and video. If you learn nothing else about artificial light, learn this. It uses three lights — key, fill, and backlight — to create dimension, control contrast, and separate the subject from the background. Most professional lighting tips for photography eventually converge on this framework because it scales from a single headshot to a full commercial production.
The key light is your main light source. It establishes the dominant direction and shadow pattern. Place it 30 to 45 degrees off-axis from the camera, slightly elevated. The fill light sits on the opposite side and controls how deep those shadows go — bright fill creates a low-contrast, commercial look; dim fill creates dramatic, high-contrast portraits. The backlight (also called a rim light or hair light) comes from behind the subject and creates a highlight along the edge that separates them from the background.
David Hobby told WIRED that three lights is “where it really gets interesting” because the interaction between key, fill, and backlight creates dimensionality that a single light cannot produce. The key-fill-backlight framework scales, too — once you understand the roles, you can add more lights for specific effects while the core logic stays the same. This is one of those lighting tips for photography that professionals lean on daily, because the framework is universal across genres.
This setup maps directly to Squareshot’s recommendation that product pages with high-quality photos see as much as 94% higher conversion rates than lower-quality images. Three-point lighting is the default for e-commerce product photography because it’s consistent, repeatable, and produces professional results whether you’re shooting a watch, a bottle, or a pair of shoes.
Most products look best under 5600K daylight-balanced lighting. That’s the color temperature your eye expects to see for objects that exist in the real world. Strobes, LED panels, and speedlights can all hit 5600K — what matters is consistency across all lights in the setup. Gels let you balance color temperature when mixing flash with ambient light, but the simplest path is to match all sources to daylight and gel only when you need a creative effect.
LED vs. Tungsten: The Lighting Revolution Every Photographer Should Understand
The shift from tungsten to LED in photography lighting is not a trend. It’s a structural change backed by hard data. Tungsten lighting bookings have dropped 40% since 2020, while LED purchases by individual photographers surged 60% annually during the same period. A three-light tungsten setup draws about 6,000 watts. An equivalent LED setup pulls roughly 900 watts — an 85% reduction in power consumption.
The CameraDocs analysis of power consumption data found that LED fixtures maintain color temperature stability within ±100K throughout their 50,000-hour lifespan. Tungsten bulbs shift color temperature as they age and generate significant heat that affects both the photographer and the subject. Photographers who switched to LED reported a 25% reduction in color correction time during editing — that’s hours saved per month for anyone shooting regularly. For photographers compiling lighting tips for photography as they build out their kit, the LED recommendation is increasingly non-negotiable.
Continuous LED lighting also changes how you work on set. With strobes, you’re guessing at the final look until you chimp the back of the camera. With LED panels, you see the light in real time. What you see is what the sensor captures. This is especially useful when teaching or collaborating — everyone on set can see the lighting decisions as they happen, not just the photographer behind the viewfinder.
The trade-off was historically power output. Early LED panels couldn’t compete with strobes for sheer brightness. That gap has narrowed significantly. Modern LED panels like the Godox SL series and Aputure Light Storm line produce enough output for most studio applications while running cool and silent. For photographers building their first studio kit or upgrading from a speedlight-only setup, LED is now the sensible default — not a compromise.
Essential Light Modifiers: Softboxes, Umbrellas, Reflectors, and Diffusers
Modifiers control the quality and spread of light. A bare bulb throws light in every direction — harsh, uncontrolled, with hard shadows and hotspots. Add the right modifier and the same bulb produces soft, directional light that looks intentional. The most practical lighting tips for photography always circle back to modifiers because they multiply what a single light can do — and understanding modifiers is what turns lighting tips for photography from abstract concepts into actionable skills.
A softbox is the workhorse modifier. It encloses the light source in a box with reflective interior walls and a diffusion panel on the front, producing soft, even light with controlled spill. The larger the softbox relative to the subject, the softer the light. A 48-inch softbox at three feet from a subject produces dramatically softer light than a 24-inch softbox at the same distance. A snoot, at the opposite end of the spectrum, narrows light into a tight spotlight for creative effects — rim light accents, hair lights, or dramatic product shots against dark backgrounds.
Simple Booth’s beginner tips emphasize starting with one light and a modifier before buying additional units. The instinct when building a kit is to buy more lights — but one light with three modifiers gives you more creative range than three bare lights ever will. A speedlight bounced into an umbrella, shot through a softbox, or snooted for a rim light — same light, three completely different looks.
Fujifilm’s studio lighting guide covers softboxes, umbrellas, beauty dishes, reflectors, and background lighting in detail. Beauty dishes deserve special mention — they sit between a softbox and a bare reflector, producing crisp light with a distinctive falloff that fashion and portrait photographers rely on for punchy, editorial looks. The catchlight in a subject’s eyes from a beauty dish is round and sharp, giving portraits an intentional, polished quality.
Reflectors and diffusers are the modifiers you carry when you can’t carry anything else. A 5-in-1 reflector (white, silver, gold, black, and translucent) weighs ounces and fits in a backpack. It fills shadows, subtracts light, or scatters harsh sunlight into something usable. For photographers working on location or traveling light, it’s often the only modifier they need. A scrim held between midday sun and a subject turns unusable light into a soft, even source in seconds.

Studio Lighting Setups That Elevate Portraits, Products, and Video
The studio is where lighting theory becomes muscle memory. You control every variable — no clouds rolling in, no sun setting mid-shoot, no venue with fluorescent tubes that pulse at 60Hz. That control is the point. It’s also why a professional studio space like Lightz Out Studios changes the equation for photographers who normally shoot on location: the lighting rigs are already in place, the backdrop options are set up, and you walk in ready to create rather than spending the first hour running cables and building stands.
For portraits, Rembrandt lighting — named for the painter, not the photographer — places the key light high at roughly 45 degrees to one side, creating a small triangle of light under the opposite eye. It’s classic, flattering, and works on nearly every face. Butterfly lighting centers the key light high and directly in front, casting a small shadow under the nose (the “butterfly”) and producing glamour-style results. Broad lighting illuminates the side of the face facing the camera — it widens features and works well for subjects with narrow faces. Short lighting illuminates the far side of the face, narrowing features and adding drama. These are the specific lighting tips for photography that portrait specialists internalize until they become second nature on set — and they’re the ones that transform a competent headshot into a memorable one.
Product photography lighting follows a different logic. The goal is to show the product accurately and attractively — texture, color, shape, and detail all need to read clearly. AI tools can now preview lighting scenarios before you touch a single light, a development that saves hours of trial and error during setup. But the fundamentals haven’t changed: large sources for soft wrap, careful flagging to control reflections on shiny surfaces, and enough fill to reveal shadow detail without flattening the product.
SmallRig covers 12 distinct lighting types for portraits including loop lighting, split lighting, and rim light techniques. Split lighting places the key light at 90 degrees to the side, dividing the face exactly in half — light on one side, shadow on the other. It’s dramatic, gender-neutral, and communicates intensity. Loop lighting is a subtle variation of Rembrandt where the key light is slightly lower, casting a small shadow from the nose that loops toward the corner of the mouth. It’s the most universally flattering pattern and the safest starting point for a portrait session.
For photographers and videographers in San Diego who want access to this kind of professional lighting environment without building it themselves, Lightz Out Studios’ headshot page shows what’s possible when the space and lighting infrastructure are already dialed in — you arrive, set your camera, and start creating.
Common Lighting Mistakes and How to Fix Them
Most lighting problems are not equipment problems. They’re decision problems. Here are the mistakes photographers make most often — and how to correct them before they cost you usable frames. Even photographers who’ve memorized dozens of lighting tips for photography still fall into these traps. The difference is they recognize them faster. The best lighting tips for photography aren’t just techniques — they’re diagnostic tools. When a shot doesn’t look right, knowing which variable to adjust saves time and frustration.
Mistake 1: Lighting everything evenly. Flat lighting is the quickest way to produce forgettable images. If every part of your frame is lit to the same exposure, there is no focal point. The viewer’s eye goes nowhere. The fix: establish a lighting ratio — key side brighter than fill side — and let shadows do their job. Contrast creates interest.
Mistake 2: Ignoring color temperature mismatches. Mixing daylight-balanced key light with tungsten ambient light from ceiling fixtures creates a color-cast nightmare that’s difficult to correct in post. Shoot RAW so you can adjust white balance without degrading quality, as Love Studios NYC recommends. Better yet, kill the ambient light and control every source yourself.
Mistake 3: Putting the light too far from the subject. Distance kills light quality. The inverse square law means doubling the distance quarters the intensity, but it also makes the source effectively smaller relative to the subject — which hardens the light. Bring your modifier as close as physically possible to the edge of your frame for the softest, most flattering result.
Mistake 4: Over-lighting before mastering one light. Adding more lights before you can reliably produce great images with a single source multiplies your problems. Every additional light introduces new shadows, new reflections, and new exposure variables. Master one-light portraits before touching a second strobe. When you can create five distinct looks with one light and three modifiers, you’re ready.
Mistake 5: Not using the environment. White walls, ceilings, and even pavement reflect light. A bare speedlight pointed at a white ceiling becomes a large, soft overhead source for free. A white wall beside your subject becomes a fill source. The most efficient light modifier in any room is whatever surface is already there — learn to bounce before you learn to diffuse.
Frequently Asked Questions
What is the best lighting for portrait photography?
Soft, directional light from a large modifier like a 36-inch or larger softbox placed 3 to 5 feet from the subject. The key light should sit 30 to 45 degrees off-axis and slightly above eye level. Add a reflector or fill light on the opposite side to control shadow depth. Natural window light with a reflector for fill produces excellent results without any artificial source — north-facing windows give the most consistent light throughout the day.
How many lights do I need to start a studio setup?
One. A single strobe or LED panel with a softbox and a reflector will teach you more about lighting than a three-light kit used poorly. The most common mistake beginners make is buying multiple lights before mastering light placement, modifier selection, and exposure ratios with a single source. The foundational lighting tips for photography work regardless of how much gear you own. Start with one light, shoot for a month, then add a second when you can articulate exactly what the first light isn’t giving you.
What’s the difference between strobes and continuous lights?
Strobes produce a brief, powerful burst of light — they freeze motion and overpower ambient light easily, but you can’t see the final effect until you review the image. Continuous lights (LED panels, tungsten) stay on — what you see is what you get, which speeds up setup and collaboration. Strobes dominate still photography for their power-to-cost ratio; continuous lights are increasingly popular for hybrid photo/video shooters who need one lighting system for both mediums.
Should I use natural light or artificial light?
It depends on what you’re shooting and when. Natural light is ideal for outdoor portraits, lifestyle work, and any situation where authenticity matters — golden hour produces light no modifier can fully replicate. Artificial light gives you consistency, control, and the ability to shoot anytime regardless of weather or time of day. The photographers who produce the most versatile work use both and know when to reach for which one.
What is the inverse square law and why does it matter?
The inverse square law states that light intensity decreases proportionally to the square of the distance from the source. Double the distance from light to subject equals one quarter the intensity. This affects exposure, shadow softness, and background brightness. Moving a light from 2 feet to 4 feet from your subject doesn’t halve the exposure — it quarters it. Understanding this relationship lets you control contrast ratios without changing modifiers or power settings.
Can I get professional results with budget lighting gear?
Yes. A $100 speedlight, a $30 umbrella, and a $20 reflector can produce images that look far more expensive than the gear that made them — if you understand light placement and modifier technique. The limiting factor in most lighting setups is not the price of the equipment. It’s how well the photographer understands direction, quality, and ratios. That’s why lighting tips for photography that focus on principles rather than product recommendations tend to have the longest shelf life — techniques outlast gear cycles. Expensive gear makes some things easier and more consistent, but it does not substitute for knowledge.
Conclusion
Lighting isn’t the most expensive part of photography. It’s the part that determines whether the expensive parts — your camera, your lenses, your time — produce work that stands out or blends in. The photographers whose careers accelerate fastest are rarely the ones with the best gear. They’re the ones who understand that light is the photograph, and everything else is just how you capture it. The lighting tips for photography collected here share one thing in common: they’re not about spending more money. They’re about seeing more clearly.
Whether you’re shooting in natural window light, building your first studio kit, or booking a fully equipped professional space like Lightz Out Studios for a production day, the principles stay the same: direction defines mood, size defines softness, and intentionality separates a photograph from a snapshot. The global photography lighting market keeps growing because more creators are recognizing exactly this. The gear is getting better. But the skill — learning to see and shape light in real time — that still belongs to you.
Ready to put these lighting techniques into practice in a professional studio environment? Contact Lightz Out Studios to book your next session — San Diego’s most versatile production space, with professional lighting rigs, backdrops, and everything you need to bring your creative vision to life.

