
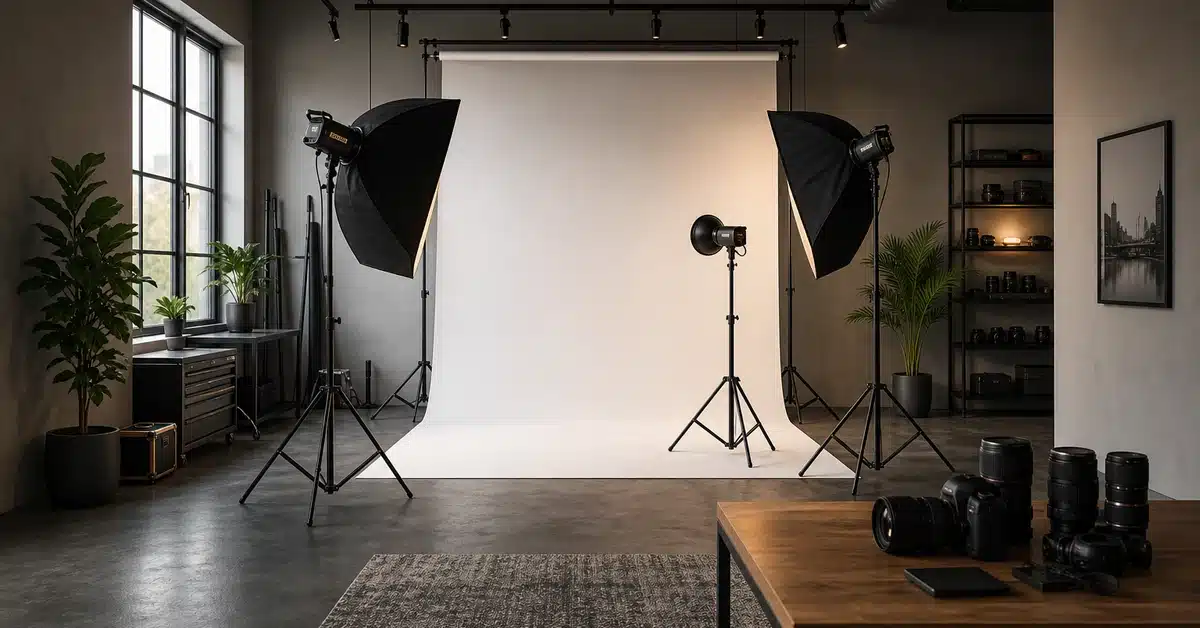
If you want full creative control over every shoot you take on, studio lighting for photography is the skill you need to master. Natural light is beautiful — but it moves, shifts, and disappears. Studio light does exactly what you tell it to. You decide where the shadows fall. You set the mood. You reproduce the same setup tomorrow, next week, or six months from now without breaking a sweat. Whether you’re shooting portraits, commercial products, music artists, or corporate headshots, understanding studio lighting for photography is what separates a snapshot from a professional image.
This guide covers everything you need to know — from the types of lights and modifiers on the market today, to the setups working photographers actually use in the studio.
Why Studio Lighting for Photography Gives You an Unfair Advantage
Most photographers start with natural light. It’s accessible, it looks great, and it requires zero gear investment. But there’s a ceiling. The moment you walk into a client briefing and they want the same results every time — or they want to shoot at 9 PM — natural light stops being an option. That’s where studio lighting for photography steps in and changes everything.
Full Control Over Every Variable
Studio lighting gives you control over four things that matter most: direction, intensity, quality, and color temperature. You choose exactly where your key light falls. You dial the power up or down without waiting for clouds to shift. You shape hard light into something soft and flattering with a modifier, or strip it back down to a hard edge for drama. When you work with professional studio lighting, you’re not working around the environment — you’re building the environment from scratch.
This matters enormously for commercial work. A brand that needs consistent imagery across a product line, a headshot client who needs matching results for every member of their team, an artist who has a specific visual identity for a music video — all of them depend on a photographer who can deliver repeatable, controlled results. Studio lighting is the foundation of that reliability.
Repeatability That Speeds Up Every Shoot
One underappreciated advantage of working in a properly equipped studio is speed. Once you’ve found a lighting setup that works, you can mark your light positions on the floor with tape, save your power settings, and re-create that exact look in under ten minutes for every session. Seasoned photographers build libraries of setups — their go-to portrait look, their product flat-lay configuration, their dramatic beauty dish setup — and pull from that library rather than starting from zero on every shoot.
For clients, this speed reads as competence and professionalism. For photographers, it means more time on the creative work that actually counts.

Types of Studio Lights: What You Need to Know
Not all studio lights are built for the same purpose. The three main categories each have distinct strengths, and understanding where each one shines helps you build a kit that fits how you actually shoot.
Studio Strobes and Monolights
Studio strobes are the workhorses of professional studio lighting for photography. They produce a burst of extremely bright light lasting a fraction of a second — fast enough to freeze motion completely. Monolights are a popular variant: self-contained units with the power pack built directly into the head, which keeps your setup clean and simple.
Strobes are the choice for portrait photographers, editorial work, and any scenario where you need maximum output and sharp image capture. They’re not always on — the burst fires in sync with your shutter — so you won’t have to deal with heat buildup over long sessions. According to Digital Photography School’s comprehensive overview of photography lighting equipment, strobes remain the most versatile tool for studio portrait and product work, precisely because of their power-to-portability ratio.
Continuous LED Panels
Continuous lights stay on throughout the shoot — you see the light in real time before you ever press the shutter. That makes them ideal for video production, hybrid photo-video shoots, and beginner photographers who want to understand how light falls before committing to a shot. Modern LED panels are daylight-balanced, dimmable, and run cool compared to older tungsten continuous lights.
The photography experts at Shoot Better make an important point about continuous studio lighting for photography: because you see the light live, beginners often learn faster with LEDs than with strobes. The feedback loop is immediate. For studios doing both photography and video production — which is increasingly the norm — continuous LEDs are an efficient solution that covers both workflows with a single investment.
Speedlights and Portable Flash
Speedlights (hot-shoe flash units) are the entry point into controlled artificial lighting. They’re portable, affordable, and capable of producing excellent results when used with the right modifiers. For on-location work or photographers building their first kit, speedlights offer a practical path to studio-quality lighting without committing to a full studio setup.
Their limitation is output. In a large studio space or when working against bright ambient light, speedlights often can’t produce enough power to dominate the scene the way a monolight can. As your work scales up, you’ll likely find yourself growing into dedicated studio flash units — but speedlights are a legitimate starting point for mastering the fundamentals of studio lighting for photography.
Essential Light Modifiers for Studio Photography
The light source itself is only half the equation. What shapes, diffuses, and directs that light — the modifier — is where the real craft happens. The right modifier can transform a harsh, unflattering blast into a soft, wrapping glow. The wrong one on the wrong subject can flatten your image completely.
Softboxes and Octaboxes
Softboxes are rectangular or square diffusion panels that attach to your light head. They scatter the output through layers of white fabric, creating a large, soft light source that wraps around your subject and minimizes harsh shadows. They’re the most versatile modifier in any studio setup, and virtually every working photographer owns at least one.
Octaboxes are the same concept in an octagonal shape. The circular catch light they create in the eyes of a portrait subject is widely considered more natural-looking and pleasing than the square catch light from a rectangular softbox. For headshots, beauty, and close-up portrait work, an octabox is often the first modifier photographers reach for.
Size matters significantly. A larger softbox produces softer, more wrapping light because it creates a larger light source relative to your subject. A smaller, more directional softbox gives you greater control over spill and shadow, which is important for dramatic, more sculpted portraits.
Umbrellas: Shoot-Through vs. Reflective
Photography umbrellas are the most affordable way to get into modified studio lighting for photography. They come in two types: shoot-through umbrellas, which you point the light through (diffusing it), and reflective umbrellas, which you bounce the light off of (reflecting it back at your subject).
Shoot-through umbrellas produce a wide, slightly directional light. Reflective umbrellas produce a more focused, specular light that carries further. Both are lightweight, collapse for transport, and set up quickly. For photographers doing events, on-location headshots, or anyone who needs a portable but effective lighting solution for studio and on-location work, umbrellas are hard to beat on practicality alone.
Beauty Dishes and Reflectors
A beauty dish sits between a bare bulb and a softbox in terms of light quality. It creates a distinctive, medium-contrast light with a characteristic “donut” catch light — a ring shape that many beauty and fashion photographers specifically seek out. The light is soft enough to be flattering but retains enough definition to accentuate skin texture and facial structure in a way that a fully diffused softbox sometimes flattens.
Reflectors — whether collapsible fill cards or dedicated studio reflectors — aren’t lights themselves but play a crucial supporting role in any professional shoot. A white or silver reflector bounced into the shadow side of your subject can reduce contrast and fill in detail without adding another power draw or setup complexity. Many photographers run a one-light setup with a reflector as their standard portrait configuration rather than adding a second strobe.

Proven Studio Lighting Setups That Actually Work
Understanding the gear is only meaningful when you know how to arrange it. These three configurations form the core framework for studio lighting for photography — start here, master each one, and you have the foundation for almost any shoot you’ll ever do.
One-Light Setup: The Foundation
Every photographer should be able to light a great image with a single source. Place your key light at a 45-degree angle to your subject, elevated slightly above eye level and angled down at roughly 45 degrees. This is the “Rembrandt position” — named for the painter — and it creates a natural, dimensional light that defines the face without flattening it.
Add a reflector on the opposite side to bounce some fill light back and you have one of the most versatile, professional studio lighting for photography configurations in existence. It’s fast to set up, easy to adjust, and consistent enough to build a whole headshot practice around.
The team at Photography Icon covers this one-light framework extensively, noting that mastering single-source control is more valuable than owning a multi-light system you don’t understand yet. Start simple, build your eye, then expand.
The Classic Three-Point Lighting Setup
Three-point lighting is the industry standard for portrait and commercial studio lighting for photography. The three elements are:
Key light: Your primary, dominant light source. This is what shapes your subject and establishes the mood. Place it at roughly 45 degrees off the subject’s axis, elevated slightly above their eyeline.
Fill light: A softer, less powerful light placed on the opposite side from the key. The fill reduces the contrast between lit and shadow sides without eliminating the dimension the key creates. A general starting ratio of 2:1 (key twice as powerful as fill) gives a natural, flattering result for most portraits.
Rim light (backlight or hair light): Placed behind and slightly above your subject, the rim light separates them from the background by creating a halo of light on the hair and shoulders. Without it, subjects with dark hair against a dark background can melt into the scene. With it, the subject pops forward with dimension and depth.
This three-point framework scales to virtually every shoot and subject type — from corporate headshots to editorial portraits to commercial product work. Learn this setup and you’ll never be stuck.
High-Key and Low-Key Studio Lighting
Beyond specific setups, understanding the two dominant aesthetic approaches to studio lighting for photography unlocks your ability to execute any brief you receive.
High-key lighting is characterized by a bright, evenly lit scene with minimal shadows — think clean white or gray backgrounds, soft fill-heavy light, and an overall upbeat, accessible feel. It’s the standard for commercial headshots, product photography against white backgrounds, and corporate imagery.
Low-key lighting does the opposite. High contrast, deep shadows, a single dominant light source, and a darker background environment create dramatic, moody images with strong visual impact. It’s the go-to for artistic portraiture, music artist promotion, and any creative work where the tone matters as much as the subject.
Studio Lighting for Different Types of Photography
The same physical toolkit translates differently depending on what you’re shooting. Knowing how to adapt your studio lighting for photography approach to the specific demands of your subject is what separates a versatile photographer from a one-trick specialist.
Portrait Photography: Flattering Your Subject
Portrait studio lighting for photography centers on how light interacts with facial features. Soft, wrapping light minimizes blemishes and creates even skin tones. More directional light accentuates bone structure and creates a more dramatic, editorial quality. Neither is inherently better — the right choice depends on the subject and the intended use of the images.
For corporate headshots, most clients want a clean, approachable look: soft key light, gentle fill, rim light for separation, neutral background. It’s a reliable, professional formula and it’s what Lightz Out Studios delivers consistently for San Diego professionals, teams, and brands. The studio’s double cyclorama wall setup gives photographers the flexibility to transition from wide environmental shots to tight close-up headshots without resetting the room. If you’re booking professional headshots in San Diego, you can explore headshot sessions at Lightz Out Studios to see what’s possible in a properly equipped professional environment.
Product Photography: Controlling Reflections and Shadows
Product photography in a studio environment is a discipline in its own right. Unlike portraits — where flattering your subject is the primary goal — product photography demands technical precision above all else. You need to control reflections on glass, metal, and polished surfaces. You need to reveal texture on fabric, leather, or food. You need to capture accurate color representation.
A diffusion tent (essentially a softbox around your entire subject) is the standard solution for highly reflective products. For fashion and apparel flat lays, large softboxes above and bounced light from below creates the even, shadow-free look that e-commerce imagery demands. For packaging and lifestyle product shots, more dramatic three-point studio lighting for photography setups tell a visual story that pure technical photography doesn’t.
This kind of commercial content production is exactly where a well-equipped studio pays for itself. The production team at InnoVision Marketing Group — the full-service San Diego marketing agency that operates from the same campus as Lightz Out Studios — leverages professional studio lighting consistently across commercial brand campaigns, video content, and marketing assets. When the creative work is integrated with the agency behind the strategy, the visual output is stronger at every level.
Color Temperature and White Balance in Studio Lighting
Color temperature is measured in Kelvin (K) and describes whether light appears warm (orange/yellow, lower Kelvin) or cool (blue/white, higher Kelvin). Daylight sits around 5500-6000K. Most studio strobes are calibrated to daylight balance. Tungsten continuous lights run warm at around 3200K. LED panels vary — some are fixed at 5600K daylight, others are bi-color and adjustable across a wide range.
Why does this matter for studio lighting for photography? Mixed color temperatures are the enemy of clean results. If your strobe is at 5600K and room ambient light is coming in at 3200K from tungsten ceiling fixtures, your shadows will be warm-tinted and your lit areas will be cool. The fix is simple: control your environment. Close the blinds, kill ambient lights that don’t match your strobe color temperature, and work in a controlled space.
Always set your camera’s white balance to match your light source. If you’re shooting with daylight strobes, set white balance to 5500K. If you’re shooting RAW files (which you should be for any serious studio work), you have the flexibility to fine-tune color temperature in post — but nailing it in-camera saves time and produces more accurate results on set.
Building Your First Studio Lighting Kit
You don’t need an overwhelming amount of gear to get started with studio lighting for photography. A focused, intentional starter kit built around your most common use cases will serve you better than an unfocused collection of equipment you never fully understand.
The minimum effective kit for most photographers starting with studio lighting for photography: one main light (strobe or LED panel depending on whether you shoot stills only or hybrid), one octabox or large softbox modifier, a light stand, and a collapsible reflector for fill. That setup will handle the majority of portrait, headshot, and basic product work you’ll encounter.
As your practice grows, you add selectively: a second light for fill or rim, a beauty dish for specific portrait styles, a background system, a boom arm for overhead lighting on products. Every addition should solve a specific problem you’re regularly hitting — not just expand the kit for the sake of it.
Renting studio space is one of the most practical ways to accelerate your development in studio lighting for photography without committing to expensive infrastructure. Access to a professionally equipped space — with the right lights, modifiers, stands, and backdrops already in place — lets you focus on learning the craft rather than troubleshooting gear. Lightz Out Studios in San Diego provides exactly that: a premium all-in-one professional environment with a double cyclorama wall, on-site production gear, and a setup designed for serious creative work, available to photographers and videographers at an accessible hourly or full-day rate.
Level Up Your Studio Work
Studio lighting for photography is a learnable skill. Not an innate talent, not something reserved for photographers who’ve been at it for decades — a repeatable, transferable craft built on understanding a handful of core principles and practicing them consistently. The gear matters less than knowing how light behaves and why.
Whether you’re a freelance photographer building your portrait practice, a music artist who wants cinematic promotional imagery, or a brand that needs commercial photography at a professional level — a properly equipped studio with great lighting is where that vision becomes a real deliverable.
Ready to put these principles to work in a professional space? Book a session at Lightz Out Studios — San Diego’s fully equipped production studio with everything you need to execute your next shoot exactly the way you imagined it. The space is yours. The light is yours to shape.

